
If you’ve ever come across a situation where there is a need to change the boot device then this document explains a step by step procedure with screen images on how to get this done. There are situations wherein the initial boot device selected is of less capacity and later there is a need to change this to something bigger one. So there is no way to increase the size of this drive since the next block device which is usually “/dev/sda2” starts from the sector wherein the “/dev/sda1” ended (*considering installation done in default mode). Hence, we’ve to plan to move all the boot files onto a new, bigger block device and make that as a boot device.
I’m going to document each step with screenshots in this post which would help anyone who wish to perform the job of changing the boot device.
System Environment
This system is installed (RHEL6.9) with two drives “/dev/sda” & “/dev/sdb” and root file system is installed on “sda” as shown below:
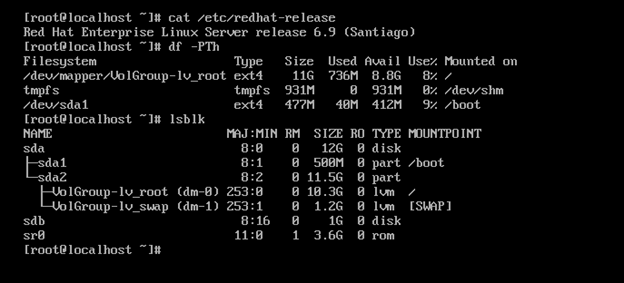
Here, the boot file system is on the block device “/dev/sda1” and root file system which is installed on a logical volume “/dev/VolGroup/lv-root” for which “/dev/sda2” is the block device.
Some Key Points
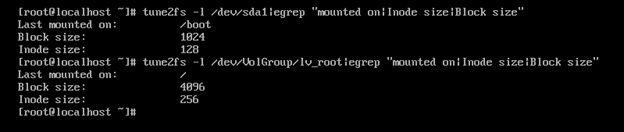
- The boot file system gets (especially in RHEL6.x) created with 128 bytes of Inode size by installer program “anaconda”, however, other files systems such as “root” would come with 256 bytes as shown below (as you see later in this section):-
- This is tested on virtual systems running in VMWare Workstation.
Let’s Begin
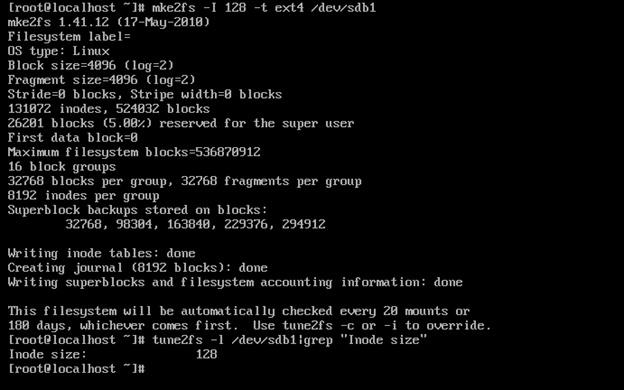
Step 1: Make a file system on secondary drive (bigger drive)
Create a partition on the target hard drive (secondary: sdb) with I-node size of 128 bytes. If we leave this to default which is 256 bytes then during the process of running grub-install on this device, system would throw up an error as “The file /boot/grub/stage1 not read correctly.” So, let’s create partition “sdb1” and file system as shown below:
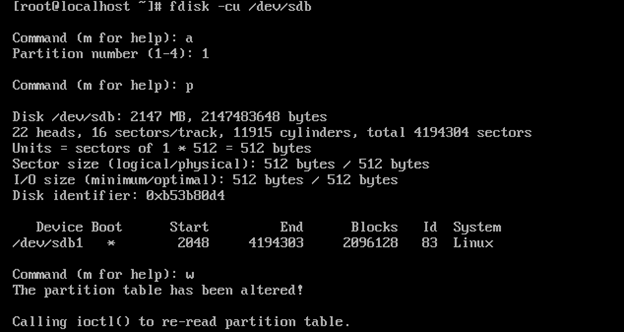
Step 2: Set the boot flag on /dev/sdb1
Make sure that the bootable flag is set on the new boot device “sdb1”:
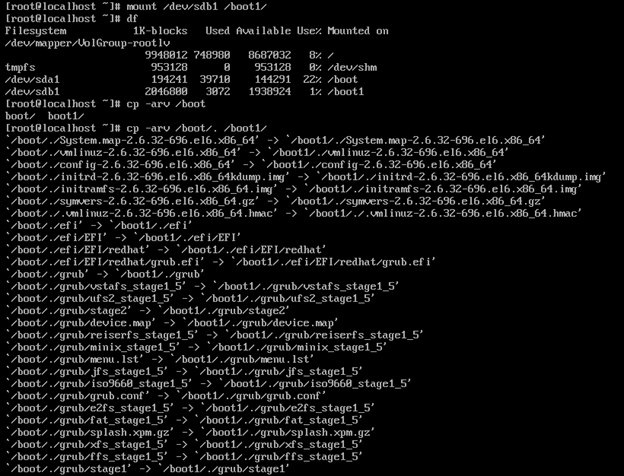
Step 3: Copy the boot files from /boot directory on to the new larger secondary block device (sdb1)
Mount the new larger secondary block device on to a directory (example, boot1) and then copy all the files from '/boot' to '/boot1' folder.
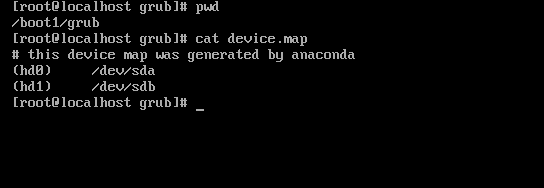
Step 4: Update device.map file
Update “device.map” file with new device entry which is residing on the new block device (/boot1/grub/device.map). Since it is the secondary hard drive it should be referred as “hd1” (as devices being referred would always starts from 0 (zero), as first drive would be referred as “hd0”, second one as “hd1”, so on), so it would be mapped to “/dev/sdb” as shown below:-
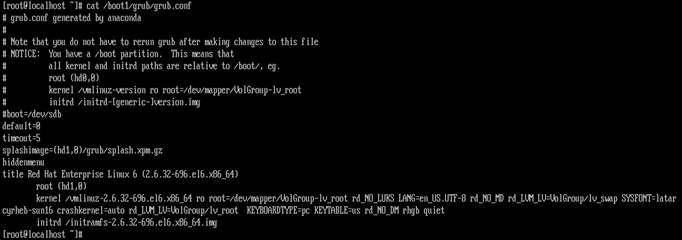
Step 5: Update grub.conf file so that it points to new block device
Edit “grub.conf” file which is there on the new block device (/boot1/grub/grub.conf) file and change the root device from “root (hd0,0)” to “root(hd1,0)”. Also, edit the “splashimage” line so that it should read as “splashimage=(hd1,0)/grub/splash.xpm.gz”. This is the change that needs to done in the default boot stanza, since there is only boot kernel here there is no problem, however, if there are multiple kernels installed then make the necessary changes to the default boot stanza.
Step 6: Install grub on to the new block device
Run the “grub” command with device being mapped along with optional argument “--no-floppy” as shown in the below snap to get the GRUB installed on to the secondary hard drive (/dev/sdb):

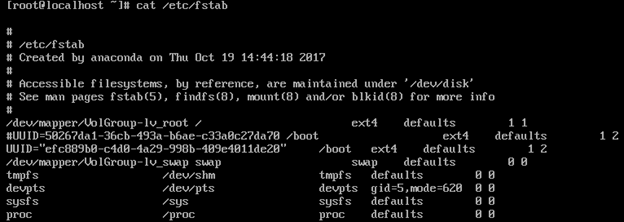
Step 7: Update /etc/fstab with sdb1 details
Now, add the UUID of the “/dev/sdb1” into the “/etc/fstab” file and make sure to comment out or remove the earlier boot device entry.
Step 8: All done, reboot and test
It is the time to reboot the system and test if “/dev/sdb1” comes up as underlying block device for boot.

Congrats! We are all set.
So, later I reformatted '/dev/sda1' partition and added it as physical volume for the “VolGroup” volume group. After this, reboot of the system failed and dropped into grub shell.
At this stage, one could boot up the system by pointing to the boot partition and manually specify kernel & initramfs files as shown below in the “grub” shell:

(grub shell can auto-fill with proper text as you see above after typing “initrd”, you leave a space and type “/initr” and hit tab key which would shows up matching files…)
Otherwise, this can be booted by specifying the boot configuration file with ‘configfile’ command as:
Grub> configfile root(hd1,0)/grub/grub.conf
I came across this Red Hat Knowledge Base article which talks about the same issue: https://access.redhat.com/solutions/183203
However, I found that there were no errors in the “grub.conf” file. So, to resolve this I had to run the command “grub-install” on first hard drive:
# grub-install /dev/sda
After running the “grub-install” I did a reboot of the system and found that the system came up without any issues and “/dev/sdb1” is the boot device. Now, “/dev/sda1” is being added as physical volume for “VolGroup” vg as shown in the below snap:-

2 comments:
Good information very useful blog post for learners.
Linux Online Training by Real Time Expert.free software training tutorials
Hello there, You have performed an excellent job. I'll definitely digg it
and individually recommend to my friends. I am confident they
will be benefited from this website.
Post a Comment